|
Macros
|
Previous Top Next |
Macros are "strings" command is used to control the Endpoints. They can range from very
simple
sequences (like on, off or dim the Endpoints) to more complex sequences.
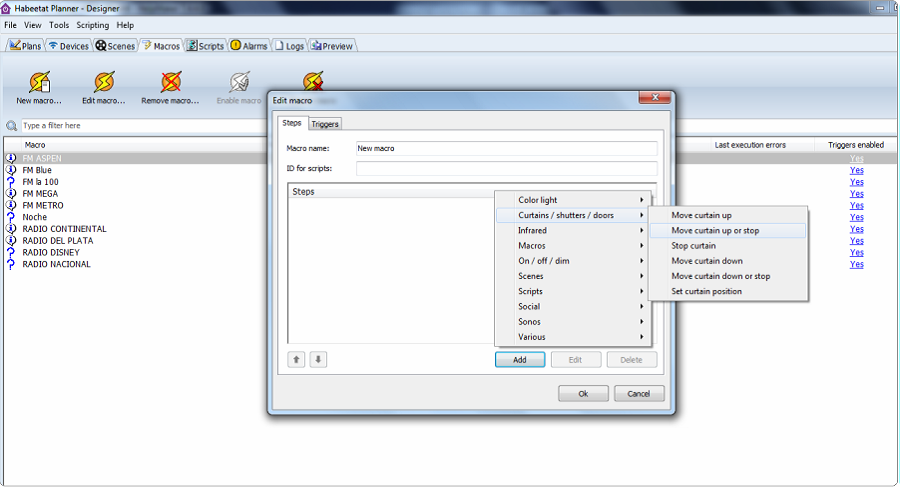
To create a macro, enter from the top menu of the Macros tab, where you can select New
Macro.
This opens a dialog box in which you must define a descriptive name and can complete the
optional ID field for scripts.
Then, by clicking on Add, you can include the actions you want to sequence in Macro. By
indicating each action, the system prompts you to select the Endpoint associated with the action.
In the Miscellaneous option, you can set the desired set breaks between each one of the
sequences in the Macro.
Macros can be configured with triggers, which are configurable actions that can trigger the macro
you need to design. For example, you can create a Macro that daily in the sunset turns the lights
of an installation.
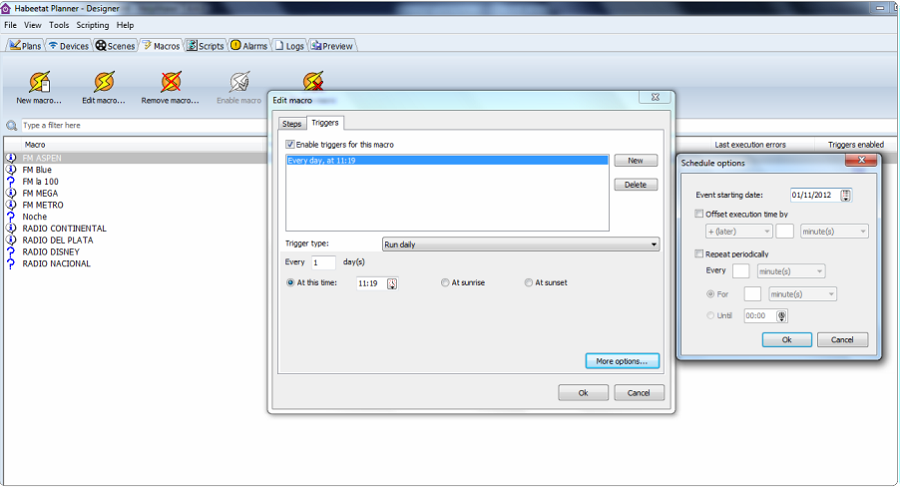
Editing Macros: Triggers configuration.
Once defined, the macro can be run in one of three ways:
· By adding the macro to a plan (in this case, with the Habeetat Planner will create a button that triggers at the Macro when acted on by the user).
· Creating a Scene that activates the Macro.
· Activating the Macro from Scripts.
A Macro can vary substantially and can be divided into three simple categories:
· Macros that run from a scene.
· Macros that run scripts.
· Macros that send specific commands to a series of Endpoints
 Note: Custom Macros are very flexible, but the
actions are executed one by one, with the
consequent delay. For this reason, it is usually recommended Scenes in place. The advantage of
this is that the scenes are executed in all endpoints at the same time, without breaks.
Note: Custom Macros are very flexible, but the
actions are executed one by one, with the
consequent delay. For this reason, it is usually recommended Scenes in place. The advantage of
this is that the scenes are executed in all endpoints at the same time, without breaks.
 See Also: