To ensure the correct operation of Habeetat Planner, you must set all variables in the Preferences dialog box, accessed from the Main Menu/ Tools/ Preferences...
Select Preferences to configure the software.
Web server: From here configure the embedded Web server.
• Network settings: the embedded Web server allows access to the plans previously defined in
the Habeetat Planner, from any browser on PC, Smartphone, Tablet, etc... When choosing a web
browser, you must select a port that is listening (usually port 80).
Is always recommended to leave enabled the embedded Web server
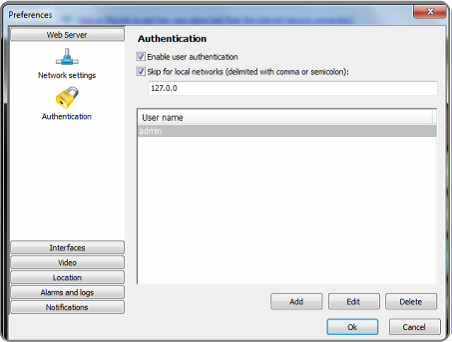
• Authentication: the web server compatible with authentication, allows you to restrict access to
certain users that you define. By default, Habeetat Planner defined the user- admin with the
password you selected during the installation. You cannot delete this user, but you can change its
password. You can also create other users, and protect them with the corresponding passwords.
Authentication is controlled by the following parameters:
• Enable user authentication: Enables or disables Habeetat Planner authentication. If cleared, all
users have access to the plan defined without the need for a user name and password.
• Skip to local networks allows you to bypass authentication for local networks, as defined in the
text box below this option. You can instruct the Habeetat Planner to avoid authentication on
networks that are "trusted". A typical example is "127.0.0" that represents all connections from
the computer on which the software is installed. You can add other networks separated by
commas or semicolons.
The list allows users to create additional users that will allow access Habeetat Planner. You can
create as many users as you want and specify a password for each one.
Authentication screen. Users list..
 Important: We recommend keeping authentication
enabled, especially if it allows access to
the Habeetat Planner web server from the Internet. Otherwise, all users can control the devices
defined in your plans. The default configuration allows authentication, and just skips to make
connections from the same computer where you installed the software.
Important: We recommend keeping authentication
enabled, especially if it allows access to
the Habeetat Planner web server from the Internet. Otherwise, all users can control the devices
defined in your plans. The default configuration allows authentication, and just skips to make
connections from the same computer where you installed the software.
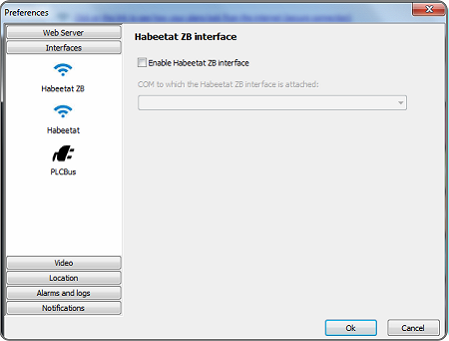
Interfaces: here you must configure what type of devices you want to work.
The Habeetat Planner allows it to integrate Solidmation devices to ZigBee networking, as well
as Habeetat line devices and PLC Bus technology devices.
To install Solidmation devices, you must enable the interface Habeetat ZB.
Select here the type of interface you use depends on the devices installed.
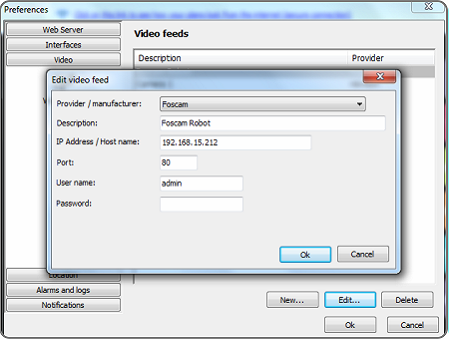
Video: allows you to manage IP video cameras from different manufacturers. From this tab you
can add or remove computers as well as configure the IP port of each of them and set a
password if it deems necessary for the installation you are designing.
Table settings for IP video cameras integrating
 See Also:
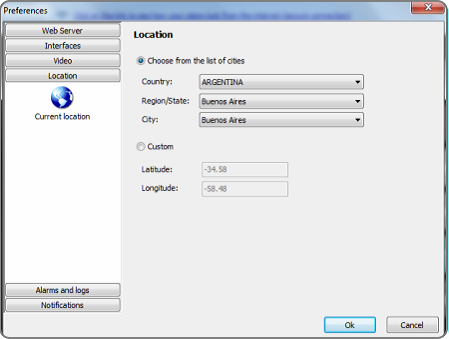
Location: In order to configure your location, enter your country, region and city, or directly
enter
the coordinates of its location in latitude and longitude.
Geographic location settings.
 Important: Latitude and longitude are very important to precisely calculate sunrise and
sunset. If you do not set this correctly then Macros and Scripts scheduled to happen at the
moment, will be incorrect.
Important: Latitude and longitude are very important to precisely calculate sunrise and
sunset. If you do not set this correctly then Macros and Scripts scheduled to happen at the
moment, will be incorrect.
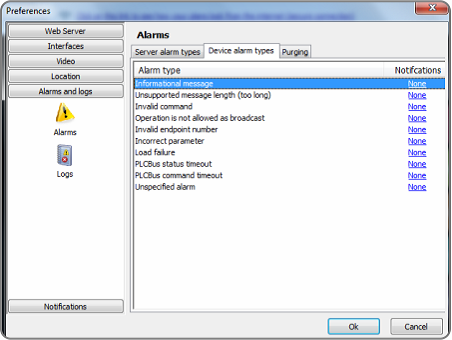
Alarms and Logs: here you can configure notifications for alarms and the number of days you
want to save the Server Logs.
· Alarms: Set the type of notification (email, Twitter or macro) you want to run for each type of
alarm that is activated from the server or from the devices.
· Debugging: it can specify a number of days (between 1 and 180) so that the alarms are kept
within the Habeetat Planner database. Alarm over this parameter is automatically deleted
from the database.
Possible Alarms configuration .
Logs: This option lets you specify the number of days (between 1 and 180) that the log files are
stored on the Server folder. These records contain a breakdown of activities Habeetat Planner
server.
 Important: records can take a significant amount of disk space. Make sure you have enough
space, if you intend to keep records for a long period of time.
Important: records can take a significant amount of disk space. Make sure you have enough
space, if you intend to keep records for a long period of time.
Notifications: These are messages that can automatically send the system to a Twitter account.
These notifications should be set later, in this step should only link an existing Twitter account to Habeetat Planner installing
Notifications Settings.
 Sea Also: