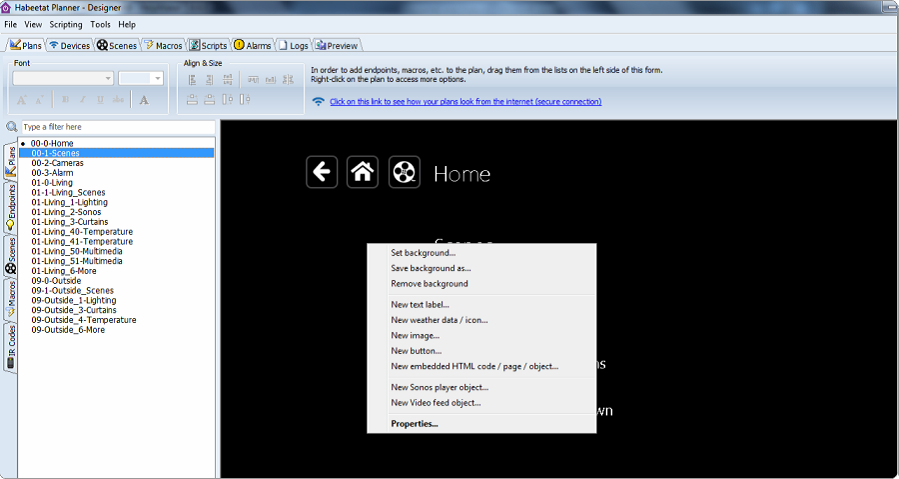
About the Work Plan, pressing the right mouse button, you get a menu that allows you to edit and
configure the plans or screens.
Menu from the Working Plan
Background edit of plan or screen:
· Set the background ... : You can find an image that is to your liking and place it in the
background of the plan.
· Save Background As ... lets you save the background used in an existing plan.
· Remove Background: removed from your plan or screen the existing background.
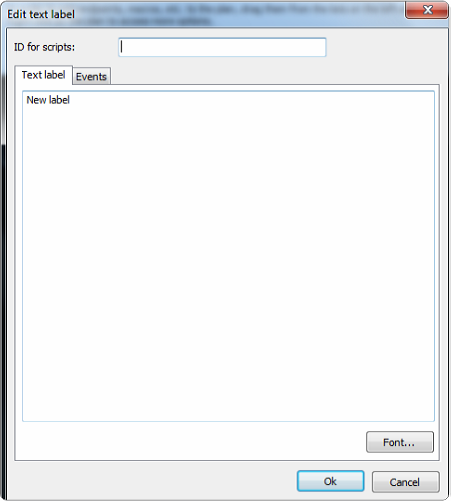
New Text ... This option allows you to type the desired text in a pop-up window and configure (or
not) actions to set the text label.
Once you insert the desired text, it appearance: color, font and size can be set from the top
menu in the Plans tab or in the same edition text box entering Font ...
New Text ... This option allows you to type the desired text in a pop-up window and configure (or
not) actions to set the text label.
Once you insert the desired text, it appearance: color, font and size can be set from the top
menu in the Plans tab or in the same edition text box entering Font ...
Text labels editing box.
· Scripts ID: This field is optional. Allows identify the text label in the Scripts. You can enter a
short name, ensuring that no two elements with the same ID.
· Text label : here you can enter the desired text.
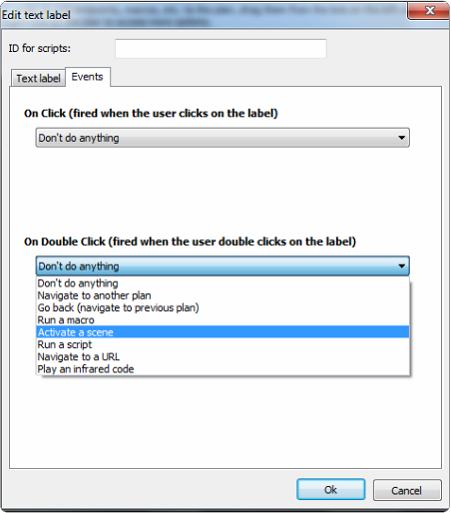
· Events: Using a drop down menu, you can schedule an action to run the software by making
one or two "clicks" on the new created label.
Text editing box: Events
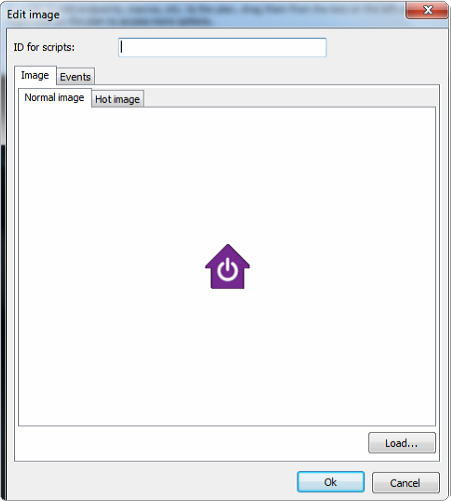
New look ... : Selecting this option lets you insert an image in the plan. In the pops up window
that appears you can load the desired image.
Image editing box
• Normal image and highlighted Image, the highlighted image is only displayed on
plans when the cursor is positioned over it. We recommend that to optimize the plans or
screens navigation use images in. Jpg or Png in RGB color scale and optimized for web
browsing.
• Events: select the actions you want the software do when you "clicks" one or two times
on the new element.
• Scripts ID: this optional field will identify the image in the scripts. You can enter a short
name, ensuring that no two elements with the same ID
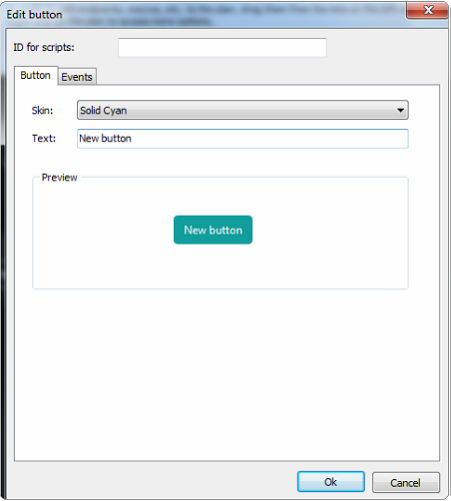
New button ... : Selecting this option will insert a button on the plan. To configure the new button
a pop up box will appear.
Buttons editing box
· Button: You can select the style of button you want to insert, from Habeetat gallery, and
insert the text that will display the button.
· Events: select the actions you want the software do when you "clicks" one or two times on
the new element.
· Scripts ID: this optional field will identify the image in the scripts. You can enter a short
name, ensuring that no two elements with the same ID
 Note: Each time you "click" on the image or button that you created, the browser will perform
the action you configured, for example will take you to the target plan.
Note: Each time you "click" on the image or button that you created, the browser will perform
the action you configured, for example will take you to the target plan.
If you used double "click", the user must double "click" on the image or button to run.
 See Also: